Last year, I made some really delicious recipes... My favorite (which will be replicated for Thanksgiving 2010) was the cornbread and chorizo stuffing. This was AWESOME, but also great to have for leftovers. Serve it for breakfast the next morning with some runny, over-easy eggs, and you'll have one bangin' brunch dish!
Here's all the photos and recipes: http://dishthisboston.blogspot.com/2008/12/thanksgiving-at-dish-gals.html
I'm thinking of making this pumpkin bread pudding this year-- doesn't that sound AMAZING? Or, perhaps I'll make these balsamic roasted sweet potatoes...
Any recipes you recommend for Turkey Day 2010?
xoxo,
DG
Showing posts with label recipe. Show all posts
Showing posts with label recipe. Show all posts


Dish Nephew's 3rd Birthday Party
I took on the task of making the food for Dish Nephew's 3rd Birthday party, as our normal caterer-- Dish Mom-- was busy at work this week. Here's what I served! 
Mixed olives
Crostini with eggplant caponata (left-- please note the little spreader knife with the eggplants I chose hehe) Crostini with herbed ricotta (store-bought ricotta, and then I added chopped fresh thyme, oregano, parsley, and rosemary).
 Spicy Pumpkin Seeds (1 cup raw, green pumpkin seeds, tossed w/ 2 Tbsp EVOO, 1 tsp chili powder, 1/8 tsp cayenne pepper-- bake at 350 degrees for about 10 minutes)
 Bacon-wrapped dates stuffed with almonds and goat cheese (my all-time favorite fall/winter hors d'oeuvre)
 Pigs in a blanket lollipops! These were a big hit with both the kids and the adults. This recipe is a little lighter than the old classic because they're made with puff pastry. Yum!
 Meatball sliders! This recipe was adapted from The Little Owl restaurant in NYC, courtesy of the amazing Deb at smittenkitchen.com:
 Meatball slider, up close and personal...
 Apparently I failed to take a photo of the roasted sweet potato and pears as well as the escarole, red leaf, and fennel salad with cider vinaigrette...Dish Gal FAIL. In any case, Dish Mom actually prepared those anyway ;)
And for the grand finale!
He seemed to like the icing the best...
 So was the party a success? I'd say so, just based on this huge grin! That's all that mattered to me, at least =)

So was the party a success? I'd say so, just based on this huge grin! That's all that mattered to me, at least =)Zucchini, Mushroom, and Goat Cheese Tart recipe
This tart recipe seems like a good choice for this seasonal shift that's happening right now, with the zucchini reminiscent of summer, and the earthy mushrooms getting us excited for fall flavors. And goat cheese, which is welcome any day of the year..jpg) Zucchini, Mushroom, and Goat Cheese Tart
Zucchini, Mushroom, and Goat Cheese Tart
.jpg) Finally add cheese-- I wish mine had had more, so go crazy with it! ;)
Finally add cheese-- I wish mine had had more, so go crazy with it! ;)
Zucchini, Mushroom, and Goat Cheese Tart Serves 4 as "main" as a light dinner or lunch-- I also served it with a side salad
Recipe from Serious Eats
Ingredients
-2 tablespoons olive oil
-2 tablespoons olive oil
-1 pound zucchini, cut into 1/4-inch rounds
-10 ounces mushrooms, sliced, preferably a mix of types (I used regular button mushrooms and oyster mushrooms)
-2 cloves garlic, minced
-1 teaspoon chopped fresh thyme leaves
-1 teaspoon chopped fresh thyme leaves
-2 tablespoon Madeira wine (I used Marsala wine)
-1 sheet frozen puff pastry-- DEFROSTED (I forgot this crucial step and had to nuke my puff pastry...not advised) (1/2 17.3-oz package)
-3 ounces goat cheese, thinly sliced (I think more than 3 oz would make this an even better recipe...can't go wrong with more cheese, am I right?)
1. Preheat oven to 400 degrees F. Line a baking sheet with parchment paper and set aside.
1. Preheat oven to 400 degrees F. Line a baking sheet with parchment paper and set aside.
2. In a large (12-inch) skillet, heat half the oil over medium-high heat. Add the zucchini slices and cook until golden, 5-7 minutes, turning halfway through. .jpg) Transfer to a plate and add the mushrooms, a good pinch of salt, and remaining oil. Continue cooking until liquid has evaporated and mushrooms have browned; add garlic and thyme and continue cooking an additional couple minutes until garlic softens. Add wine and cook until it has evaporated and absorbed into the mushrooms, about 1 minute. Season to taste.
Transfer to a plate and add the mushrooms, a good pinch of salt, and remaining oil. Continue cooking until liquid has evaporated and mushrooms have browned; add garlic and thyme and continue cooking an additional couple minutes until garlic softens. Add wine and cook until it has evaporated and absorbed into the mushrooms, about 1 minute. Season to taste.
Transfer to a plate and add the mushrooms, a good pinch of salt, and remaining oil. Continue cooking until liquid has evaporated and mushrooms have browned; add garlic and thyme and continue cooking an additional couple minutes until garlic softens. Add wine and cook until it has evaporated and absorbed into the mushrooms, about 1 minute. Season to taste.3. Lay puff pasty on parchment paper and prick all over with a fork, leaving 1/2 inch border on the sides. Spread mushrooms over sheet then layer zucchini on top.
then layer zucchini on top.Finally add cheese-- I wish mine had had more, so go crazy with it! ;)4. Cook in the oven 30 to 40 minutes, until edges of pastry are golden and puffed. Let stand 5 minutes before slicing.
.jpg) (Sorry for the blurry iPhone photo!)
(Sorry for the blurry iPhone photo!)
(Sorry for the blurry iPhone photo!)Rosemary & Sage Burgers with Chive Mayo and Apple Slaw
First of all, SO sorry for the lack of posting. As some of my Twitter followers and Facebook fans probably guessed, I moved out of the North End this past week (so sad). Moving day was especially hellish, as it was just me and Dish Mom for the most part (special shout out to Sebastian though who came home just in time to assist me after my meltdown of epic proportions after a random Italian guy wandering around yelled at me for parking on the sidewalk). I don't really care to count how many times I went up and down my four flights of rickety apartment stairs to load up the car...My thigh muscles/entire body the next morning would probably, if they had to, guess about 4 million trips.

Plus, check out my new iPhone photos!!! I am very excited to utilize my new best friend, err, phone, to the best of my ability for blogging-purposes. The quality is pretty good, no??
Burgers
1/2 pound extra-lean ground beef
1/2 pound lean ground pork (I omitted this and just used beef)
1 tablespoon chopped fresh rosemary
1 tablespoon chopped fresh sage
1/4 teaspoon salt
4 whole-grain buns (I can never find whole grain hamburger buns. Thus, these are normal ones)
1 cup baby spinach leaves
2 tablespoons chopped fresh chives
2 dashes each salt and pepper
2 teaspoons extra-virgin olive oil
1 teaspoon fresh lemon juice
1/4 teaspoon salt

In a small bowl, combine mayo ingredients.
For apple slaw
In a medium-sized bowl, combine slaw ingredients. (My apples turned brown really quickly. I'd probably up the lemon amount. I couldn't grate fast enough before they browned!)
To assemble
Toast the buns and spread each top with mayo. Place burger on bun and top with slaw and several spinach leaves.
 Dish Mom made a side of roasted sweet potatoes (heaven) on the side:

Will be blogging a lot this weekend! Get ready...
Anyway, busy times at work + moving + mourning/celebrating the North End to the best of my ability (lots of late night trips to Bova's, testing out last minute restaurants, etc.) led to a general feeling of grossness. So when it came time to cook dinner this past Sunday, I looked up some recipes I had flagged from Self magazine. Surprisingly enough, one of them was a recipe for burgers! A hangover-friendly recipe that is also healthy!? Cha-ching! They turned out very moist and actually quite refreshing and light-tasting for a burger. I liked the moistness from the sour cream as a healthier alternative to cheese.
Plus, check out my new iPhone photos!!! I am very excited to utilize my new best friend, err, phone, to the best of my ability for blogging-purposes. The quality is pretty good, no??
Rosemary & Sage Burgers with Chive Mayo and Apple Slaw
Serves 4
Burgers
1/2 pound extra-lean ground beef
1/2 pound lean ground pork (I omitted this and just used beef)
1 tablespoon chopped fresh rosemary
1 tablespoon chopped fresh sage
1/4 teaspoon salt
4 whole-grain buns (I can never find whole grain hamburger buns. Thus, these are normal ones)
1 cup baby spinach leaves
Chive "mayo"
1/2 cup non-fat sour cream2 tablespoons chopped fresh chives
2 dashes each salt and pepper
Apple slaw
3 green apples, peeled, cored and grated2 teaspoons extra-virgin olive oil
1 teaspoon fresh lemon juice
1/4 teaspoon salt
Preparations for burgers
Preheat grill to medium high. Combine beef, rosemary, sage, and salt in a medium-sized bowl; form into 4 patties. Grill patties 4 minutes on each side or until juices run clear.mmm, meat...
For chive "mayo"In a small bowl, combine mayo ingredients.
For apple slaw
In a medium-sized bowl, combine slaw ingredients. (My apples turned brown really quickly. I'd probably up the lemon amount. I couldn't grate fast enough before they browned!)
To assemble
Toast the buns and spread each top with mayo. Place burger on bun and top with slaw and several spinach leaves.
Dish Mom made a side of roasted sweet potatoes (heaven) on the side:Will be blogging a lot this weekend! Get ready...
Dish Gal's Forays Into Veganism...and a recipe for Sweet Potato & Black Bean Quesadillas!
When I tell people that I was vegan for four days, the reaction is completely polarized: Either the person is shocked and impressed ("You ate no meat for four days!?") or laughs at me and gives me that "I knew you couldn't do it" face. Hrmph. Neither is really the reaction I was looking for.
But I'm getting ahead of myself... let's start from the beginning. A few weeks go, I attended one of Dish Mom's dinner parties, which I love as the food is always fabulous. I had been eating pretty healthily leading up to it-and even during it-until I reached this beautiful cake that had caught my eye the second it entered my home. Tall, dark, and very handsome, this chocolate cake was sprinkled with fleur de sel, suggesting that whoever made it knew what they were doing. Sweet and salty? Yes, please!!
Finally, the cake was cut. It was heaven. But when the sugar high wore off, my insides were NOT happy-- my system was definitely not used to that much sugar, eggs, flour, etc. The next day, I definitely had a food hangover. I knew I needed to cleanse. I needed to get back to pure ingredients, and get as far away from baked goods as possible.
And thus goes the story of how a salty chocolate cake led me to choose veganism.
During my brief 4 day experiment with being vegan, I noticed some things. First, lunches, breakfasts, and snacks weren’t that hard—even desserts (Whole Foods has a ton of vegan baked goods). But dinner was another story. I quickly even became sick of quinoa salads (I'd been having a lot of them leading up to the vegan adventure, including this one below for lunch, dinner, and then another dinner...) And when I decided to have a veggie burger for dinner one night, I quickly became frustrated when I realized most contain egg whites—and spent a long time wandering the grocery store aisles, pouring over each ingredient list until finally I found this one-- an Amy’s vegan veggie burger.

One fun grocery store discovery—veggie cheese. I bought the pepper jack flavor, which at only 35 calories a slice, I expected to taste pretty crappy. But I was wrong- this stuff is flavorful! And, as the packaging claims, it really does melt well. Downside though—the ingredients list was filled with unknown, chemical-sounding ingredients. Blech.

I wish I could’ve stuck to the vegan-thing longer, but sadly I have the world’s most sensitive stomach, and it completely rebelled against my brain’s decision to go vegan. I mean, it staged an all-out coup, twisting and turning and generally making me want to lie down in the fetal position. So sadly, after four days, I caved and had an omelette. Sigh.
There were things I realized I could never give up, like white fish like halibut or tilapia. I love my chicken sausages (SO easy and cheap). Egg sandwiches are a Dish Gal favorite. And of course, the occasional cheeseburger. But other changes have stuck-- I've been still enjoying soy milk with my coffee instead of regular milk. I've continued with the tofu lunches. And I love the emphasis on fruits and veggies.
And so I’ve decided to join the “flexitarian” bandwagon—those people that eat mostly vegetarian and the occasional meat product. This article explains the term more, and credits the recession for its increasing momentum and popularity. Besides fiscally making sense, I’d add on for myself the environmental benefits of eating mostly vegetarian. Paul McCartney recently brought some attention to the “Meat Free Mondays” cause, which promotes the idea that if everyone in the world gave up meat for one day we could greatly help the environment. New York Times food writer Mark Bittmann has even gotten some attention for his "Vegan Before 6" strategy, where he lets himself choose anything after 6 p.m., allowing him to reap some of the health benefits of being vegan, while remaining a "foodie."
In the meantime, here’s my favorite recipe that I made up from my vegan days. . . This was SO good, I can’t wait to make it again. I have a feeling my meat-loving friends will enjoy it, too =)
Sweet Potato & Black Bean Quesadillas
Serves 1
2 tortillas
1 medium sweet potato, cubed, into 1” pieces
1 slice Monterey jack veggie cheese (or can be just vegetarian and use real Monterey jack cheese, but that has way more calories if you’re interested)
1/4 cup black beans, rinsed
handful of roughly chopped cilantro
½ lime, juiced
cayenne pepper
olive oil
1. Pre-heat oven to 425 degrees.
2. Toss cubed sweet potatoes with a tablespoon or two of olive oil. Place on a baking sheet and roast for about 25 minutes total, tossing once halfway. Remove and let them cool a bit.
3. Smush them in a bowl, and then season with S&P, lime juice, and a dash of cayenne pepper.
4. Spread this mixture on a tortilla. I used a high fiber, low-cal one with flax seeds. Add black beans and the cilantro. Then add the cheese, and top with the other quesadilla.
5. On a greased (with cooking spray) non-stick skillet, heat to medium-low heat and cook quesadilla, flipping once, about 6 minutes on each side.
6. Enjoy!
But I'm getting ahead of myself... let's start from the beginning. A few weeks go, I attended one of Dish Mom's dinner parties, which I love as the food is always fabulous. I had been eating pretty healthily leading up to it-and even during it-until I reached this beautiful cake that had caught my eye the second it entered my home. Tall, dark, and very handsome, this chocolate cake was sprinkled with fleur de sel, suggesting that whoever made it knew what they were doing. Sweet and salty? Yes, please!!
Finally, the cake was cut. It was heaven. But when the sugar high wore off, my insides were NOT happy-- my system was definitely not used to that much sugar, eggs, flour, etc. The next day, I definitely had a food hangover. I knew I needed to cleanse. I needed to get back to pure ingredients, and get as far away from baked goods as possible.
And thus goes the story of how a salty chocolate cake led me to choose veganism.
During my brief 4 day experiment with being vegan, I noticed some things. First, lunches, breakfasts, and snacks weren’t that hard—even desserts (Whole Foods has a ton of vegan baked goods). But dinner was another story. I quickly even became sick of quinoa salads (I'd been having a lot of them leading up to the vegan adventure, including this one below for lunch, dinner, and then another dinner...)
And when I decided to have a veggie burger for dinner one night, I quickly became frustrated when I realized most contain egg whites—and spent a long time wandering the grocery store aisles, pouring over each ingredient list until finally I found this one-- an Amy’s vegan veggie burger.One fun grocery store discovery—veggie cheese. I bought the pepper jack flavor, which at only 35 calories a slice, I expected to taste pretty crappy. But I was wrong- this stuff is flavorful! And, as the packaging claims, it really does melt well. Downside though—the ingredients list was filled with unknown, chemical-sounding ingredients. Blech.
I wish I could’ve stuck to the vegan-thing longer, but sadly I have the world’s most sensitive stomach, and it completely rebelled against my brain’s decision to go vegan. I mean, it staged an all-out coup, twisting and turning and generally making me want to lie down in the fetal position. So sadly, after four days, I caved and had an omelette. Sigh.
There were things I realized I could never give up, like white fish like halibut or tilapia. I love my chicken sausages (SO easy and cheap). Egg sandwiches are a Dish Gal favorite. And of course, the occasional cheeseburger. But other changes have stuck-- I've been still enjoying soy milk with my coffee instead of regular milk. I've continued with the tofu lunches. And I love the emphasis on fruits and veggies.
And so I’ve decided to join the “flexitarian” bandwagon—those people that eat mostly vegetarian and the occasional meat product. This article explains the term more, and credits the recession for its increasing momentum and popularity. Besides fiscally making sense, I’d add on for myself the environmental benefits of eating mostly vegetarian. Paul McCartney recently brought some attention to the “Meat Free Mondays” cause, which promotes the idea that if everyone in the world gave up meat for one day we could greatly help the environment. New York Times food writer Mark Bittmann has even gotten some attention for his "Vegan Before 6" strategy, where he lets himself choose anything after 6 p.m., allowing him to reap some of the health benefits of being vegan, while remaining a "foodie."
In the meantime, here’s my favorite recipe that I made up from my vegan days. . . This was SO good, I can’t wait to make it again. I have a feeling my meat-loving friends will enjoy it, too =)
Sweet Potato & Black Bean Quesadillas
Serves 1
2 tortillas
1 medium sweet potato, cubed, into 1” pieces
1 slice Monterey jack veggie cheese (or can be just vegetarian and use real Monterey jack cheese, but that has way more calories if you’re interested)
1/4 cup black beans, rinsed
handful of roughly chopped cilantro
½ lime, juiced
cayenne pepper
olive oil
1. Pre-heat oven to 425 degrees.
2. Toss cubed sweet potatoes with a tablespoon or two of olive oil. Place on a baking sheet and roast for about 25 minutes total, tossing once halfway. Remove and let them cool a bit.
3. Smush them in a bowl, and then season with S&P, lime juice, and a dash of cayenne pepper.
4. Spread this mixture on a tortilla. I used a high fiber, low-cal one with flax seeds. Add black beans and the cilantro.
Then add the cheese, and top with the other quesadilla.5. On a greased (with cooking spray) non-stick skillet, heat to medium-low heat and cook quesadilla, flipping once, about 6 minutes on each side.
6. Enjoy!
Asian Chicken Meatballs
 As I started to write this, I realize every recipe I post always has the same intro: [Insert recipe title here] is easy, fast, healthy, and delicious! This one is no different =) I guess one should assume reading a Dish Gal approved recipe that it's all of these things...
These meatballs were kind of a bizarre dinner choice, but really hit the spot! The original recipe suggested they be put in lettuce cups, but I enjoyed mine with my favorite dipping sauce -- spicy szechuan-- and some steamed sugar snap peas and brown rice. This also made for great leftovers for lunch the next day!
Dish Gal's Asian Chicken Meatballs
Serves 2
Dish Gal's Asian Chicken Meatballs
Serves 2
1/2 pound ground chicken
1 garlic cloves, minced
1/2 teaspoon ground ginger (should substitute fresh, but I only had dried)
1/2 tablespoon toasted sesame oil
1 teaspoon rice vinegar
1 teaspoon soy sauce
¼ cup cilantro leaves
¼ cup cilantro leaves
1/2 tsp red hot pepper flakes (or more, depending on how much spice you like!)
Here are some of the ingredients all set to go:
 First, I set about doing my prep work, chopping my garlic and the cilantro (not pictured).
 Next, in a large bowl, stir together ground chicken, garlic, ginger, sesame oil, vinegar, soy sauce, and crushed red hot pepper flakes. Form mixture into 12 meatballs. They will seem a little too wet, especially since they don’t contain any egg or breadcrumbs. BUT distress not, and continue on ;)
  Lightly coat a nonstick skillet with cooking spray and heat to medium-high. Add meatballs and cook, turning occasionally, until browned on all sides, 5 to 7 minutes.
 This is my all time favorite stir fry sauce. It has a major kick to it, which I love, and a little goes a long way:
  I also loves these microwaveable brown rice packs; they definitely cut down on the 50-minute brown rice cook times!
Finally, sprinkle the meatballs with your chopped cilantro, et voila! An easy, fast, healthy, and delicious meal ;)

A North End, Roof Deck Fiesta (plus, Dish Gal's artichoke bruschetta recipe)
Dish Gal is definitely a city gal. That’s why a BBQ on a North End roofdeck, with grilled fish tacos, Coronas, and great friends is pretty much my idea of a perfect summer night.
A few Saturdays ago, Jacques invited us over for some food and libations. Skylar and Michelle insisted I bring my artichoke bruschetta, which apparently has developed a following despite it not being my all-time favorite appetizer. Flattered, I of course obliged.
Before starting to make mine, I watched as Skylar and Michelle prepped their appetizer—proscuitto-wrapped dates stuffed with goat cheese and almonds. Holy yum! Here they are before getting popped into the oven: When we arrived at Jacques', I set to work. Sebastian helped out as my sous-chef for the evening—well, part of the evening. In the beginning, he deftly handled draining the artichokes (once I told him what “draining” meant), rubbed garlic on the bread like a true all-star, and read aloud the instructions when I didn't have a hand free to grab the recipe:
 However, when I hit a mini-crisis when my pan got too hot and oil spurted everywhere, he was nowhere to be found! Couldn’t take the heat in the kitchen, apparently ;) Thankfully, Maeve swooped in, not only with a helping hand, but also with a delicious grapefruit gimlet for me! Woohoo! (Recipe to come later in the week on Dish This! Be sure to check back!)
  Here’s the recipe for Dish Gal's Artichoke Bruschetta, adapted from Martha Stewart Living.
 Artichoke Bruschetta
2 cloves garlic, peeled
10-12 slices rustic bread, about 3/4 inch thick
2 tablespoons extra-virgin olive oil, plus more for drizzling
One 12-ounce jar marinated artichoke hearts, drained
1/2 cup fresh ricotta cheese
Coarse salt and freshly ground pepper
Shaved Parmesan cheese, for garnish
Directions:
1) Chop 1 garlic clove, and set aside. Gently crush remaining clove, and rub over one side of each of the bread slices. Brush both sides of bread with 1 tablespoon olive oil. Toast slices on a grill or in a skillet over medium-high heat until golden and crisp on both sides. Transfer to a serving platter, and set aside.
2) Heat remaining tablespoon olive oil in a medium skillet over medium-high heat. Add reserved garlic and artichoke hearts. Saute until golden, 3 to 4 minutes. Set aside.
3) Season ricotta cheese with salt and pepper; spread about 2 tablespoons of mixture on each slice of bread. Top with sauteed garlic and artichokes. Season again with salt and pepper. Garnish with shaved Parmesan cheese, and drizzle with olive oil.
Well, actually Titanic was on TNT, so THAT was the perfect end to a perfect evening ;)
A few Saturdays ago, Jacques invited us over for some food and libations. Skylar and Michelle insisted I bring my artichoke bruschetta, which apparently has developed a following despite it not being my all-time favorite appetizer. Flattered, I of course obliged.
Before starting to make mine, I watched as Skylar and Michelle prepped their appetizer—proscuitto-wrapped dates stuffed with goat cheese and almonds. Holy yum! Here they are before getting popped into the oven:
When we arrived at Jacques', I set to work. Sebastian helped out as my sous-chef for the evening—well, part of the evening. In the beginning, he deftly handled draining the artichokes (once I told him what “draining” meant), rubbed garlic on the bread like a true all-star, and read aloud the instructions when I didn't have a hand free to grab the recipe:However, when I hit a mini-crisis when my pan got too hot and oil spurted everywhere, he was nowhere to be found! Couldn’t take the heat in the kitchen, apparently ;) Thankfully, Maeve swooped in, not only with a helping hand, but also with a delicious grapefruit gimlet for me! Woohoo! (Recipe to come later in the week on Dish This! Be sure to check back!) Here’s the recipe for Dish Gal's Artichoke Bruschetta, adapted from Martha Stewart Living.Artichoke Bruschetta2 cloves garlic, peeled
10-12 slices rustic bread, about 3/4 inch thick
2 tablespoons extra-virgin olive oil, plus more for drizzling
One 12-ounce jar marinated artichoke hearts, drained
1/2 cup fresh ricotta cheese
Coarse salt and freshly ground pepper
Shaved Parmesan cheese, for garnish
Directions:
1) Chop 1 garlic clove, and set aside. Gently crush remaining clove, and rub over one side of each of the bread slices. Brush both sides of bread with 1 tablespoon olive oil. Toast slices on a grill or in a skillet over medium-high heat until golden and crisp on both sides. Transfer to a serving platter, and set aside.
2) Heat remaining tablespoon olive oil in a medium skillet over medium-high heat. Add reserved garlic and artichoke hearts. Saute until golden, 3 to 4 minutes. Set aside.
3) Season ricotta cheese with salt and pepper; spread about 2 tablespoons of mixture on each slice of bread. Top with sauteed garlic and artichokes. Season again with salt and pepper. Garnish with shaved Parmesan cheese, and drizzle with olive oil.
***************
Easy, right? And clearly a crowd-pleaser, as they were all gone within minutes.
However, I was much more excited for Jacques' food-- homemade guacamole, tangy cabbage slaw, and three different types of fish tacos (salmon, cod, and shrimp). Also, some amazing corn on the cob with cayenne pepper butter. Oh, and three different types of salsa (hot, mild, and fruit). We finished off the night with some pies, courtesy of Whole Foods—strawberry-rhubarb and a lemon almond. Yummy, and nice not having to get the kitchen too hot! Perfect end to a perfect evening.

We finished off the night with some pies, courtesy of Whole Foods—strawberry-rhubarb and a lemon almond. Yummy, and nice not having to get the kitchen too hot! Perfect end to a perfect evening.Well, actually Titanic was on TNT, so THAT was the perfect end to a perfect evening ;)
Project Muffin 2009
A few weekends ago, I embarked upon what I called "Project Muffin:" I spent one Sunday making muffins with my new muffin pan. The impetus? To make enough muffins that would be a healthy grab-and-go option for breakfast (and keep me from ordering those 500 calorie monstrosities at Dunkin).
As you may have realized from reading this blog, I'm not a huge baker, so this was a very different undertaking for me. All the measuring, the baking soda, the flours-- oy vey! Not to mention the fact that I realized halfway through I didn't even own regular sugar! But I managed to sub in brown sugar quite nicely.
 My sister in law gave me this cookbook for my birthday, and I had been dying to try out a recipe from it. The photos are beautiful, and her emphasis on whole, natural ingredients is very thorough and informative.
Here's a link to the recipe. It was straightforward and easy to follow, but boy did I make a mess of my tiny kitchen! I guess baking involves a lot more counter space (that I don't have) than cooking:
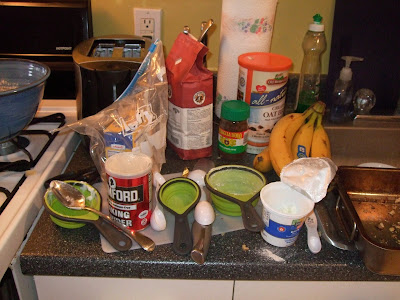
Yikes! =)
Here are the muffins before going into the oven:

And the muffins after!

As you may have realized from reading this blog, I'm not a huge baker, so this was a very different undertaking for me. All the measuring, the baking soda, the flours-- oy vey! Not to mention the fact that I realized halfway through I didn't even own regular sugar! But I managed to sub in brown sugar quite nicely.
My first muffin I attempted was the espresso banana walnut muffin recipe from Heidi Swanson's book, Super Natural Cooking:
My sister in law gave me this cookbook for my birthday, and I had been dying to try out a recipe from it. The photos are beautiful, and her emphasis on whole, natural ingredients is very thorough and informative.Here's a link to the recipe. It was straightforward and easy to follow, but boy did I make a mess of my tiny kitchen! I guess baking involves a lot more counter space (that I don't have) than cooking:
Yikes! =)
Here are the muffins before going into the oven:
And the muffins after!
YUM! The walnuts definitely were the best part of these, plus I loved the earthiness from the coffee flavor. One morning I warmed it up and served it with a spoonful of peanut butter, which sounds weird but was awesome.
Next, I cleaned up my area and started on the next muffin recipe: Blueberry banana muffins, a recipe I found from Self magazine. So my first muffin was healthy in a Whole Foods, organic way, and the second one was healthy in more of a low-fat, low-calorie way.
I must've been running out of steam from all the baking, because I have fewer pictures of the process of making this second muffin, but here's the final product:

These were good warm, but didn't hold my attention over the course of the next week like the espresso ones did. Plus, they didn't hold up well, either. In fact, I left my apartment for the next weekend and came back expecting a stale and hardened muffin, only to find one that was completely MUSH. EW.
In conclusion, at first after the long afternoon of schlepping home pounds of flour from Whole Foods (I can't wait for the days when I grocery shop with a car, sigh...), and then making a mess of my apartment and cleaning it all up (twice), and sitting in a hot apartment, I swore to myself that this was not worth it. However, now that I've run out of the muffins, I'm starting to think about resurrecting this project this weekend...
I mean, I already have most of the ingredients! Might as well, right!? ;)
Super easy pasta dinners
 I am a huge fan of pasta for a quick, healthy dinner on weeknights. As long as you are careful about the portioning of pasta, it's easy to make a healthy yet delicious dinner in just a few minutes. Plus, with minimal ingredients, neither of these recipes will break the bank.
Here are two (very similar) versions of Dish Gal's "Easy Summer Pastas"
Cheesy Rotini with Fresh Basil and Sun-Dried Tomatoes
Serves 1
1 cup Barilla Plus (or whole wheat) rotini
1 wedge laughing cow cheese
sundried tomatoes
fresh, torn basil leaves
1/2 tbsp chopped walnuts
1. Boil water, cook pasta according to directions (for Barilla Plus, 10 minutes for al dente).
2. Drain pasta (but you can leave it a little bit moist from pasta water). Add back into pot. Stir in wedge of laughing cow cheese until it creates a cheesy coating on pasta.  3. Add in sundried tomatoes, walnuts, and fresh basil. Season with S&P. Enjoy!
3. Add in sundried tomatoes, walnuts, and fresh basil. Season with S&P. Enjoy!
Rotini with Sweet Apple Chicken Sausage, Walnuts, and Sundried Tomatoes
Serves 1
Serves 1
1 cup Barilla plus rotini (or whole wheat)
sundried tomatoes
1/2 tbsp chopped walnuts
1 link sweet apple chicken sausage
2 tbsp EVOO
fresh, torn basil leaves
1. Boil water; cook pasta according to directions.
2. Meanwhile, heat some EVOO in a skillet over medium heat. Slice the link of chicken sausage into small, 1/2" circles and then add to pan. Cook until browned, about 5-7 minutes.
3. Drain pasta. Return to pot. Add in tomatoes, walnuts, basil, and chicken sausage. The oil from the sausage should coat the pasta nicely. If you want more "sauce," add in some more EVOO. Season with S&P. Enjoy!

I <3 Avocado
Avocados have a season? How did I not realize that about my favorite fruit (and possibly favorite food)?
Here's some info, via Serious Eats, about the glorious avocado:
I plan on trying every recipe.
Photo via rd.com
Sweet Chicken Sausage and Apple Salad recipe
This is one of Dish Gal's favorite 10 minute meals. It's especially great in summertime, when the thought of standing over a hot stove or turning on the oven makes you wanna call for delivery. I'm particularly fond of the sweet sausage and tart apple combination in this. I have to give credit to Skylar, who introduced me to this awesome flavor combination! Thanks, Sky.

Dish Gal's Sweet Apple Chicken Sausage and Granny Smith Apple Salad
Serves 1
Mixed salad greens (baby spinach works especially well)
1 1/2 sweet apple chicken sausage links, sliced
1 granny smith apple, diced into pieces about 1/4"
mushrooms
for balsamic vinaigrette (I never measure, so just eyeball it)
2 parts EVOO
1 part balsamic vinegar
teaspoon of dijon mustard
sprinkle of thyme
S&P
1. In a skillet over medium heat, warm up chicken sausage for about 6-7 minutes. I like mine a little bit darkened.
2. Combine salad, mushrooms, and apple on a plate. Add sausage.
3. Combine ingredients for dressing. Toss. Serve!
Easiest recipe ever, right?
Enjoy!
Dish Gal's Sweet Apple Chicken Sausage and Granny Smith Apple Salad
Serves 1
Mixed salad greens (baby spinach works especially well)
1 1/2 sweet apple chicken sausage links, sliced
1 granny smith apple, diced into pieces about 1/4"
mushrooms
for balsamic vinaigrette (I never measure, so just eyeball it)
2 parts EVOO
1 part balsamic vinegar
teaspoon of dijon mustard
sprinkle of thyme
S&P
1. In a skillet over medium heat, warm up chicken sausage for about 6-7 minutes. I like mine a little bit darkened.
2. Combine salad, mushrooms, and apple on a plate. Add sausage.
3. Combine ingredients for dressing. Toss. Serve!
Easiest recipe ever, right?
Enjoy!
Grilled Fish Tacos w/ Avocado Cream & Slaw
Dish Gal was home in the 'burbs last night, and offered to make dinner for the rents. I was craving my favorite food combo: cilantro, avocado, and lime (I've realized in my cooking I just make different dishes with those three ingredients), and when I realized Dish Mom and Dad had never had fish tacos before, I knew I had to make them. I'm sad I didn't have my camera handy, because these were filled with gorgeous colors, from the red cabbage to the bright green avocado. Oh well, you'll just have to use your imagination ;)
Dish Gal's Fish Tacos
Serves 3
For the fish:
4 small (5 oz or so) tilapia filets
1/2 teaspoon paprika
2 cloves garlic, minced
3 tablespoons olive oil
For the avocado cream:
1 avocado, roughly chopped
2 tablespoons fresh lime juice
1/2 cup light sour cream
For the slaw:
1/4 of a head of red cabbage, shredded
1/4 of a head of green cabbage, shredded
2 green onions, sliced
1 tablespoon light mayonnaise
1 tablespoon nonfat, plain yogurt
2 tablespoons apple cider vinegar
6 taco shells
lime wedges for garnish
1 cup cilantro leaves
1. In a small bowl, combine paprika, olive oil, and garlic. Place the tilapia filets in a large baking dish, and brush the olive oil mixture on them. Season with S&P. Cover and refrigerate 30 minutes to 4 hours. (I did about 45 minutes.)
2. Combine the two types of cabbage and the green onion in a large bowl. In a small bowl, mix the mayonnaise and the yogurt together. Add to the cabbage mixture; toss to dress. Season with
S&P and add about 2 tablespoons of apple cider vinegar (to taste). Cover and refrigerate.
3. In a small bowl using a hand mixer blend the avocado and the lime juice. Fold in sour cream. Set aside. Season with S&P.
4. Using a grill pan, heat the stove to moderate to high heat. Grill the tilapia filets 3 minutes per side, or until cooked through. Roughly chop them into smaller pieces.
5. To assemble the tacos: add a dollop of avocado cream, then the fish, then the coleslaw mixture, and then top with fresh cilantro. Serve with lime wedges and hot sauce on the side.
Dish Gal's Fish Tacos
Serves 3
For the fish:
4 small (5 oz or so) tilapia filets
1/2 teaspoon paprika
2 cloves garlic, minced
3 tablespoons olive oil
For the avocado cream:
1 avocado, roughly chopped
2 tablespoons fresh lime juice
1/2 cup light sour cream
For the slaw:
1/4 of a head of red cabbage, shredded
1/4 of a head of green cabbage, shredded
2 green onions, sliced
1 tablespoon light mayonnaise
1 tablespoon nonfat, plain yogurt
2 tablespoons apple cider vinegar
6 taco shells
lime wedges for garnish
1 cup cilantro leaves
1. In a small bowl, combine paprika, olive oil, and garlic. Place the tilapia filets in a large baking dish, and brush the olive oil mixture on them. Season with S&P. Cover and refrigerate 30 minutes to 4 hours. (I did about 45 minutes.)
2. Combine the two types of cabbage and the green onion in a large bowl. In a small bowl, mix the mayonnaise and the yogurt together. Add to the cabbage mixture; toss to dress. Season with
S&P and add about 2 tablespoons of apple cider vinegar (to taste). Cover and refrigerate.
3. In a small bowl using a hand mixer blend the avocado and the lime juice. Fold in sour cream. Set aside. Season with S&P.
4. Using a grill pan, heat the stove to moderate to high heat. Grill the tilapia filets 3 minutes per side, or until cooked through. Roughly chop them into smaller pieces.
5. To assemble the tacos: add a dollop of avocado cream, then the fish, then the coleslaw mixture, and then top with fresh cilantro. Serve with lime wedges and hot sauce on the side.
Lemon Chicken with Olives
I very, very rarely eat or make chicken. When I cook it, I usually get so scared that it's undercooked that I overcook it, making it tough and chewy. I also never order it at restaurants because I think it's usually pretty boring. Why get the chicken when you can get the duck, the steak, or even just an inventive vegeterian dish!?
However, something about this recipe that was emailed to me from Real Simple piqued my interest. I love green olives, and I had a bunch of the ingredients already sitting at home. So it came about that I decided to actually cook myself chicken.
And you know what? This came out AWESOME. I would cook it again in a heartbeat. And the chicken cutlets, since they are so thin, cook fast and stay juicy. It tastes sort of like an updated version of chicken piccata, but without the heavy butter sauce. I highly recommend this if you're an olive fan! It's like a dirty martini in food form ;)
However, something about this recipe that was emailed to me from Real Simple piqued my interest. I love green olives, and I had a bunch of the ingredients already sitting at home. So it came about that I decided to actually cook myself chicken.
And you know what? This came out AWESOME. I would cook it again in a heartbeat. And the chicken cutlets, since they are so thin, cook fast and stay juicy. It tastes sort of like an updated version of chicken piccata, but without the heavy butter sauce. I highly recommend this if you're an olive fan! It's like a dirty martini in food form ;)
 Lemon Chicken with Olives
Serves 4
2 tablespoons all-purpose flour
1/2 teaspoon ground cumin
2 teaspoons lemon zest, plus 1 tablespoon fresh lemon juice
Kosher salt and pepper
1 1/2 pounds chicken cutlets
2 tablespoons olive oil
2 shallots, thinly sliced
1 cup pitted green olives
1/2 cup flat-leaf parsley, roughly chopped
1/2 cup dry white wine (such as Sauvignon Blanc)
1. Mix the flour, cumin, zest, 1/2 teaspoon salt, and 1/2 teaspoon pepper on a flat plate. Pat the chicken dry with paper towels and dredge in the flour mixture. Heat 1 tablespoon of the oil in a large skillet over medium-high heat. Cook the chicken in 2 batches until golden brown, 2 to 3 minutes per side. Transfer to a plate.
2. Wipe out the skillet and return to medium heat. Heat the remaining oil. Add the shallots and cook until soft, 5 to 7 minutes. Stir in the olives, parsley, lemon juice, and wine and bring to a boil.
3. Return the chicken to the pan, nestling it in the olives and shallots. Reduce heat to low and cook, covered, until the chicken is cooked through, about 5 minutes. Divide among individual plates, spooning the olives, shallots, and any sauce over the top.
Subscribe to:
Posts (Atom)